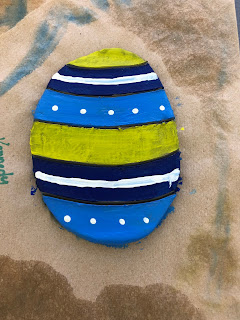
Clay Eggs
This activity was tied to the Easter holiday. Each student received a ball of clay, an egg outline, and a roller. They had to map out their egg design before they began with their clay. This ensured that the students' clay wouldn't dry up on them from taking up time. When they were ready to roll out their clay, they used two sticks and their roller. The sticks ensured that the clay got an even roll. After it was rolled evenly they got to mold the clay into an egg shape. It was a requirement for the students to add or subtract from their clay. They just had to do one or the other. For this egg, we subtracted clay. When they had finished they got to paint their egg. Requirements for the painting aspect they had to have two primary colors and a tint. The two primary colors used here are blue and yellow. The tint is light blue.
For an extension activity, students could make clay caterpillars for the beginning of spring. You could still have the students use two primary colors and a tint. This would be a good activity for the students to work with their hands and improve their fine motor skills. All you would need is clay, paint and maybe pipe cleaners for their antennas.


Comments
Post a Comment